
One of the game projects that I had started together with my trusty team was born from a dark fantasy pen and paper world I had written. In that world was a creature that was similar to a jellyfish, but flying in the air. It was interesting journey to get that into the engine, so here’s how that happened.
Modelling
Since all of this is a stylized lowpoly world, the modelling didn’t take very long at all. It is pretty much a sphere with tentacle-like things attached to it. I did end up duplicating the sphere and making the copy smaller so that it is inside the main one. In the shader section it’ll become obvious why.
The only aspect worth explaining in more detail is the UV map. Since I knew the whole creature will be one single color, I didn’t need any UVs, really. Instead, I used the UV coordinates to use later in the shader. The whole model is simply projected from the top and then fit into the UV 0-1 space.
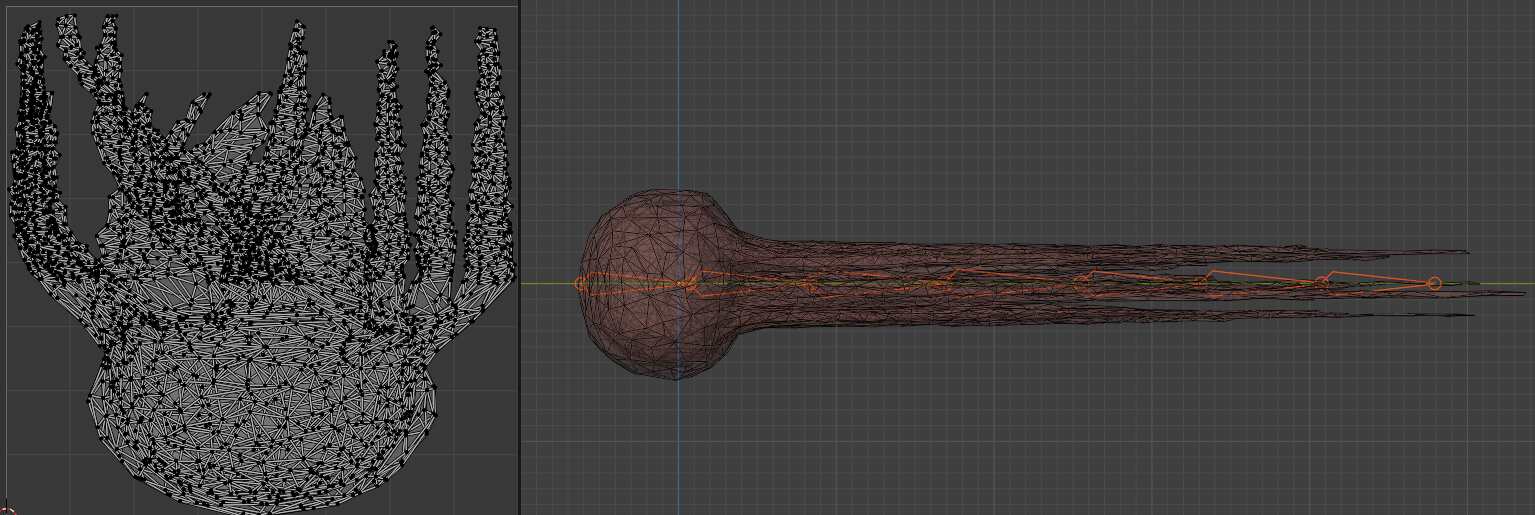
UV Map on the left and Model and Rig on the right
Movement Setup in Unreal
The movement setup took much more work. Mainly because there is a node that is supposed to do exactly what I wanted but apparently it is buggy and I could not get it to work. The creature should float around in the air, not quite like a jellyfish, but basically simply following a spline. And there is the Spline IK node (in Animation Blueprints) but it just did all kinds of wonky stuff whenever I tried to get it to work. So I saw myself tasked with writing my own spline movement.
There are two components that have to work together well with each other in order for this to work. The actor blueprint and the animation blueprint. The actor blueprint would do all the calculations regarding speed, how much space is between the bones and making it properly loop. It will then send a list of transforms to the animation blueprint. The animation blueprint then really only sets the location and rotation of each bone according to this list.
It was important to calculate with the spline in terms of 0 to 1. Meaning the whole journey starts at 0 and once the whole spline is traversed it reaches 1 upon which it should loop. That is why I would say at the heart of this whole calculation is a Modulo node with a value of 1. I will use Desmos to show what that does. With a value that’s always increasing (like in our case time) moduloing it with 1 means the value will loop in a 0 to 1 range.

Calculating everything within this range, however, means that variables become rather unintuitive. Instead of a speed in meters per second, we would have to assign a speed in percent of the whole spline per second. And even worse: if we decide to change the spline, these values would change with it. If our speed is 0.01, meaning one percent of the spline per frame, then we would loop through the spline in a certain amount of time. If the spline then changes, it would take the same amount of time to traverse it, but the speed might change because instead of it being 20 meters long, it is now 60 meters long. The creature would then have to traverse those 60 meters in the same time.
What we do instead is to create separate variables that are in meters (or centimeters in UE) and independent of the spline length.
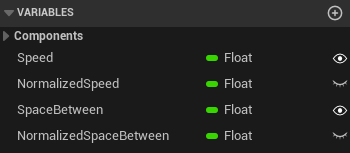
We end up having two editable variables for the speed and the space between each bone. On BeginPlay each get converted into the normalized 0-1 space so that we can calculate locations and rotations on the spline using these.
Every frame we add the delta time to our current time and then use the GetLocationAtTime(), GetDirectionAtTime(), and GetRightVectorAtTime() functions to build Transform variables for each bone position. Again, these get sent to the animation blueprint where each bone assumes the Transform assigned to it.
Shader Setup
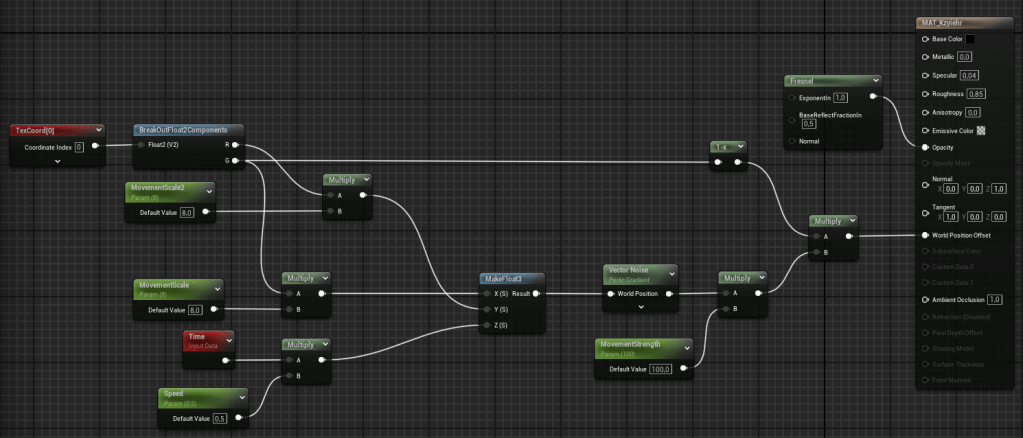
The shader was a lot of experimenting, which was very fun. What I ended up with was an actually rather simple setup. The base color, metallic, and roughness value are all the same throughout the entire model, so no textures needed. The opacity becomes less the more a face points to the camera. Simply done with a Fresnel node. This is where the duplicate model makes a difference as there is a bit more going on inside.

The world position offset is a bit more complex. We take the Y position of the UV map to determine how much the end of the tentacles should move compared to the start. The X position of the UV map can be used to make some tentacles move more than others. Both of these are then combined with Time in a float3 which is used as the position for a Vector Noise. This is the basis for the world position offset.
Particle Setup
Lastly, in order to make it look a bit less like a jellyfish, there is a particle system attached to the head. It consists of three possible triangles that are randomly chosen. It was important that they stay in worldspace and do not move with the creature itself. After having tried to fade them out, I decided it looks better if the particles simply scale back to zero.
Conclusion
I like the setup the way it is now. It would be interesting to combine more bones, so as to make the movement less straightforward. It was disappointing to see that the SplineIK node is apparently glitched. But making my own system would now allow for more customization. In hindsight, I’m very glad I was forced to do this spline-system on my own.
